Preface
It's been a while since I posted anything, because instead of writing blog posts and guides, I've been experimenting with a bunch of old and new hardware, so I always had more work in my hands. Almost every time I tried something new, I had to write a ton of notes, and I write more of them than I can incorporate into a guide, so... Life is complicated.
I suspect this post comes as a huge surprise. Have I descended into Nintendo/other console OEM hell? Did I embrace proprietary tech? Not exactly, but I can't confirm whether or not I've got insane (if I wasn't already). Oh well.
What this is
"8BitDo Mod Kit for Original NGC Controller", as it's officially named, is a proprietary kit consisting of a custom board which replaces the stock board in original GameCube controllers, while not placing the burden of transplanting parts from the original board, unlike boards like PhobGCC.
Features
The features it provides, on top of all existing features of the stock controller, are:
- Bluetooth-based wireless connectivity
- L3 & R3 buttons
- Improved stickboxes based on hall effect instead of mechanical
- The battery is advertised to last about 6 hours
On top of that, additional care was taken to make it as easy as possible to install:
- All components are already soldered, and some wires that were originally soldered directly to the board are replaced with connectors
- No need for a soldering iron!
- A tri-point screwdriver is included, meaning there's no need to buy a 50-in-1 screwdriver set or this specific type of screwdriver
- The antistatic bag which the board is delivered in is multi-use, intended to keep the original board after modification
Issues
Charging
First off, as the mod kit was designed to not require any destructive modification, charging was achieved with a DC 2.0mm x 0.6mm barrel jack which replaces the original cable. The charging cable you get (which they separately offer here) is merely 0.5m long, so you won't be able to charge and play (but yes, (ideally) with a longer cable, it's possible to connect).
Stick misalignment
Note: This section should be largely irrelevant soon as a fix is being worked on!
Edit: It's been a while and no progress has been made. There is no estimate or hope that this will be addressed anytime soon. Remember, don't buy based on promises, they may never be met!
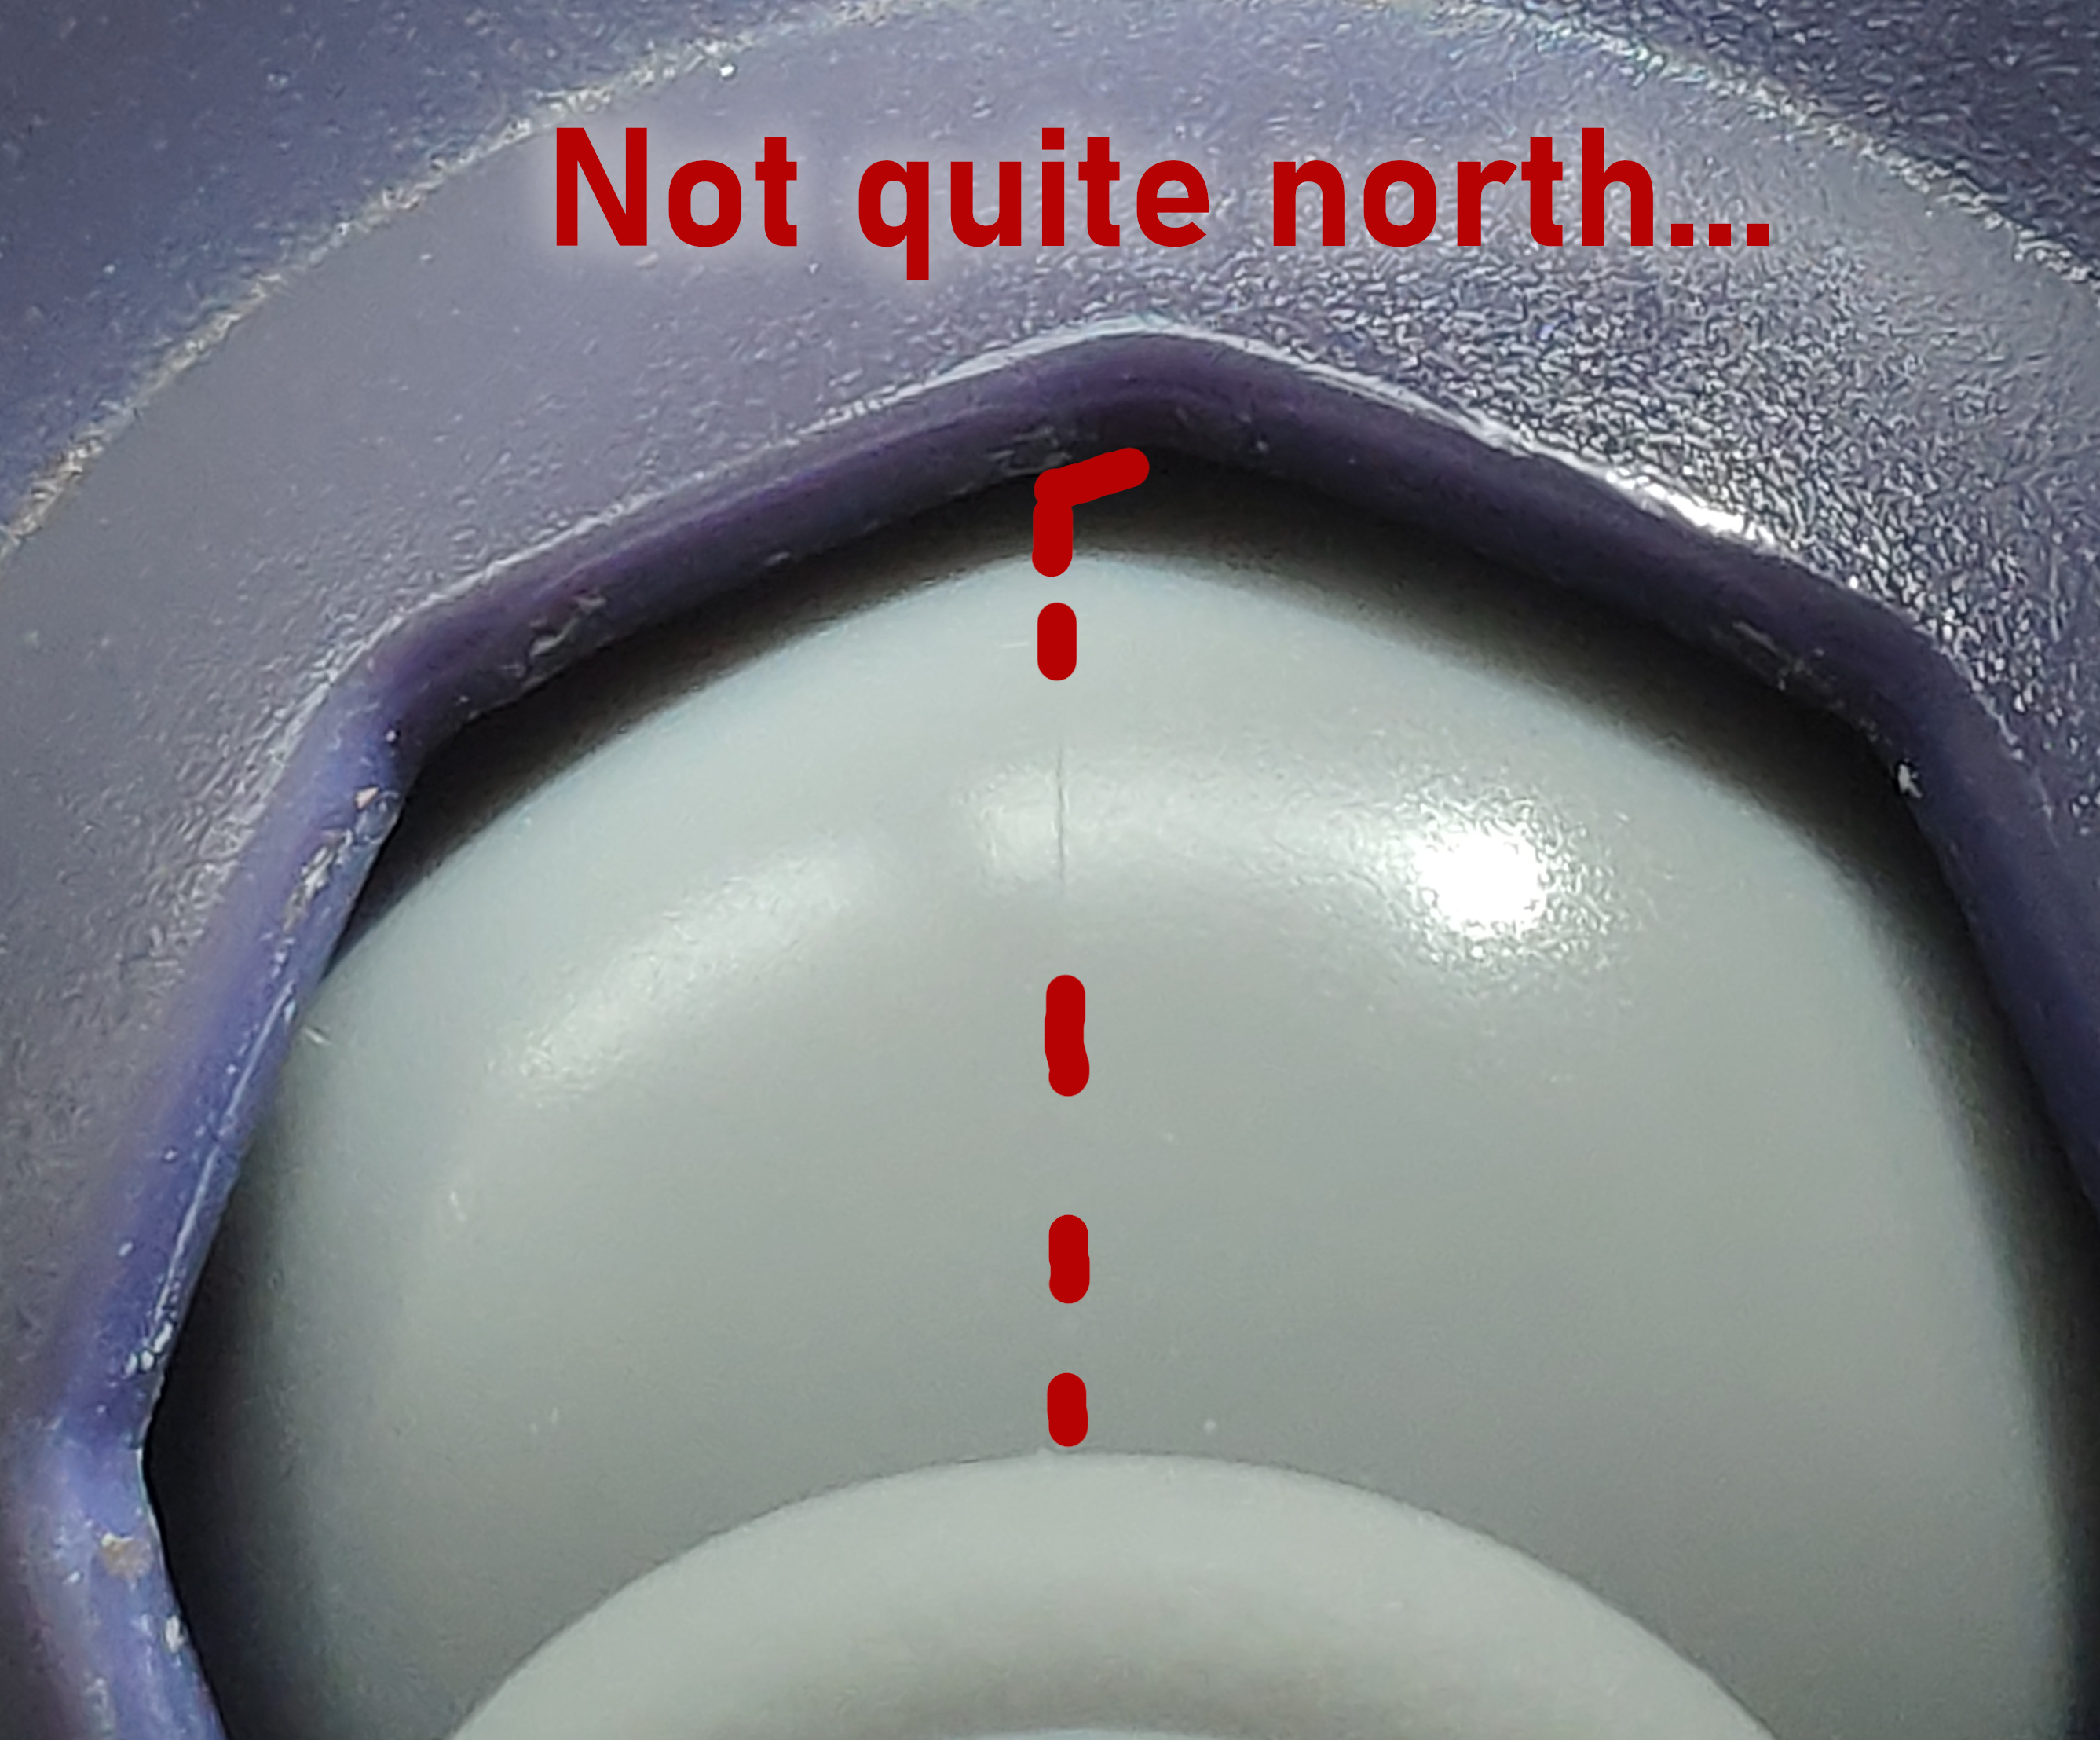
I checked my two original boards against 8BitDo's board, and it looks like 8BitDo decided not to rotate analogue sticks for some reason. This is a problem because the directional notches on the shell were designed with this clockwise rotation in mind.
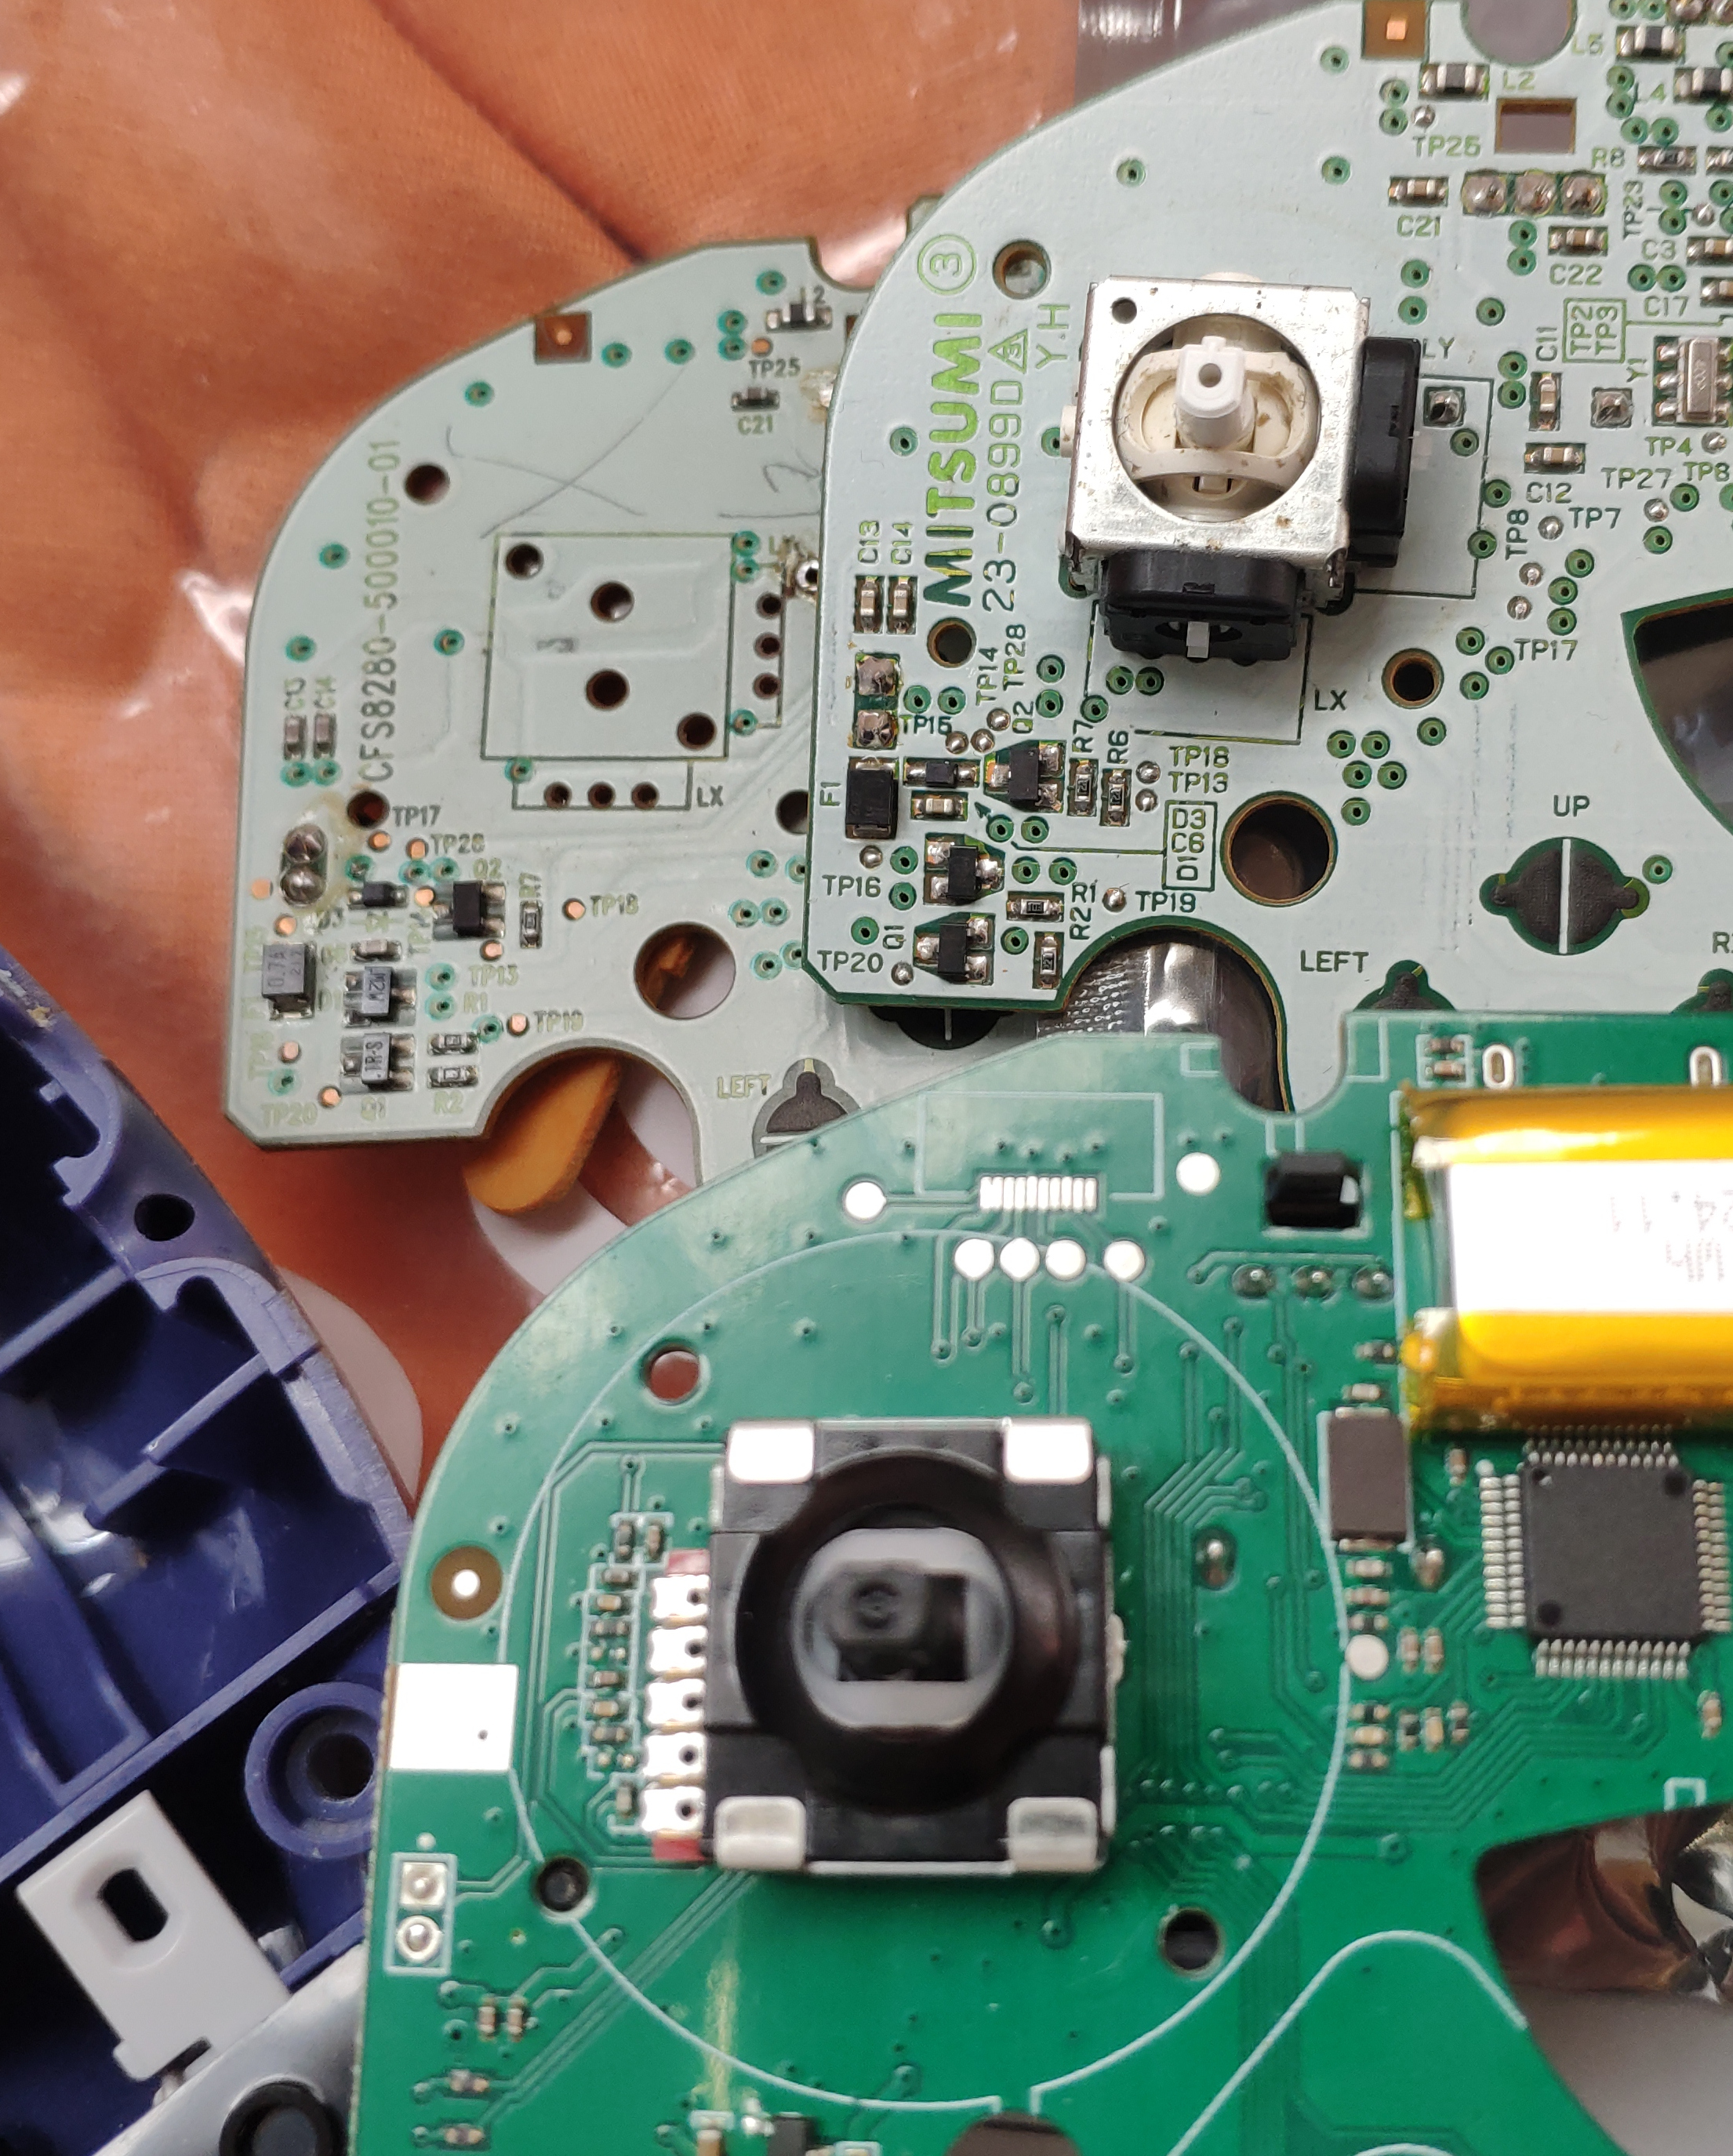
Top: v3 and v2? board, bottom: 8BitDo board
It wouldn't be a problem if the firmware let the user calibrate stick rotation, which currently isn't possible, so the user is left with a slightly tilted analogue stick.
A fundamental flaw (or poor quality control) resulted in a large amount of units having misaligned analogue sticks. According to comments on r/8bitdo, miscalibrated or misaligned analogue sticks are a common problem. As of the time of writing, my unit is defective in this exact way and I am waiting for a response from 8BitDo support.
Exclusively wireless
As is evident by marketing material, controller cable is nowhere to be seen, and indeed, there's no way to make the controller wired after making the modification. It is theoretically possible to drill a hole in the outer shell in order to connect a USB-C cable to the USB-C port intended for firmware updates, but I found no mention of USB-based controls being an existing feature, or even planned for the future.
Analogue stick support
Some input methods don't support analogue L and R triggers. I didn't notice this issue, and drivers may have improved in the meantime, so don't forget to check if it is supported in your use case.
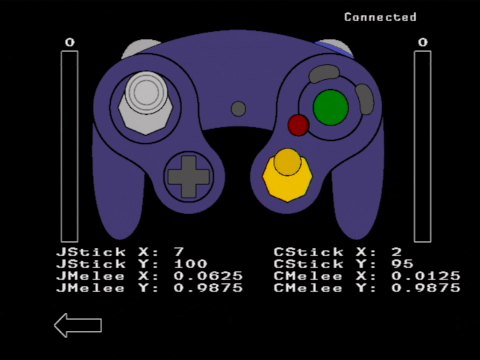
(Fixed) Bad stick ranges with suggested receiver
If you get the suggested Retro Receiver for NGC (also here?), allegedly you may run into bad analogue stick ranges (0-128). Edit: It seems a firmware update fixed this as I didn't observe this issue on Wii! Tested on the firmware update that ships with newly ordered units, which is the latest stable release.
Proprietary/closed source
Finally, the entire kit is proprietary. No source is provided for the hardware or the software, however as of the time of writing, 8BitDo engineers have made an update, so the product is definitely not abandoned.
Installation notes
The paper manual provided in the package has clumsy instructions, as in they are ordered in an odd way (place the board in the controller shell before attaching connectors on the board?). They're otherwise okay and have a bit of additional information.
Luckily, the installation video provided on the store page is perfectly adequate and gives all the information you could possibly need.
An issue you might run into with the rumble motor, especially if you desolder the wires, is that the elongated wire will be awkwardly long. You can absolutely use the full length, but it makes cramming it to fit slightly challenging.
Instructions
Pairing
Note that while I barely addressed Windows devices, if there isn't native compatibility, you're likely to be able to use Steam Input to play with this controller.
- Power on with Y+Start for GameCube/Switch mode
- Only Switch is specified in manual, which is confusing
- Analogue triggers work on 8BitDo Retro Receiver for NGC, which works on:
- GameCube
- Wii RVL-001
- (Untested) Wii U/Switch GameCube controller USB adaptor, clones
- Windows 10/11 (USB)
- Linux desktop/Steam Deck (USB)
- Analogue triggers don't work on Switch, or directly connected generic devices like Linux desktop, Steam Deck
- Power on with B+Start for Android mode
- Analogue triggers work on anything that can connect in this mode (Android, BlueRetro, Linux desktop, Steam Deck,...)
Updating firmware
In order to enter firmware update mode, hold the Z button while plugging in a USB-C cable into the controller. Ensure that the cable has data lines (i.e. supports file transfer).
Windows/macOS
The only officially supported way to update this mod kit is by using Ultimate Software V2, which only supports Windows and macOS as of the time of writing.
Linux
8BitDo stopped updating all firmware to LVFS, meaning that you can't use fwupd by itself to update firmware. However, you can use this script to download the firmware and manually apply it.
Alternatively, you may browse 8BitDo's "secret" file servers here, here and here (view more) to find direct downloads (NGCDIY for modkit, NGCRR for receiver).
Private beta firmware
On top of the aforementioned options, 8BitDo has provided in-development beta firmware via customer support for testing:
-
Updater - included in this reupload (source)
- Necessary for applying custom firmware on Windows
- Unsigned executable, but appears to be safe
- SHA256:
5cfb5e834ddc34c713687ea40263717b2cd4e46303c8c9e1ecf8440c74be4eb7
-
- Implemented manual calibration with L+R+Z
- SHA256:
5bd85d543e1c0be73c18aa31342370b535dc5f9ea8dd869533c8b783ca321acb
-
- Implemented workaround for left stick physical misalignment by snapping to cardinal directions
- SHA256:
741640db66890581ad9c02477b7b9a127ef9c470b5fe225bf9e8a9bf56e3db10
Calibrating analogue sticks
Note: This doesn't appear to help if the stickboxes are physically misaligned.
Updating firmware using any firmware version should reset the calibration, which by itself might be enough.
If none of the firmware officially provided by 8BitDo's Ultimate Software V2 or their API solves the issue, install firmware version >= V1.01_Beta1 as provided in Private beta firmware.
Then, manually calibrate the controller:
- Keep both analogue sticks neutral, and hold down L+R+Z at the same time
- After the red light flashes for approx. 8 seconds, the controller has entered calibration mode
- Rotate the left and right analogue sticks twice
- Press the L+R+Z combination, the red light should turn off
- The calibration is finished
Conclusion
If you wanted to get one, I'd recommend PhobGCC instead, if you can get it done. While it is great having the additional features of this mod kit, there is currently no fix for misaligned analogue sticks (edit: it is being worked on!).
I can't speak about the delay as I haven't determined it myself, so in that regard I can't say if it's adequate against wired controllers.
Comments
There are no comments yet.